A split menu displays different levels of a single menu hierarchy in two separate module positions—for example, top-level items across a horizontal navigation bar, with each section's child items appearing in a sidebar that updates depending on which top-level item is active. This avoids maintaining separate, hand-built menus for the top navigation and the sidebar; Joomla keeps them in sync automatically from one underlying menu structure.
Prerequisites
- 1 Tutorial Introduction covers where to run your tutorial, and includes the required frontend/backend login and site-viewing tutorials (1.1, 1.2, 1.3).
Setup
Create the Articles
- Navigate to Content > Articles and click New. Result: A new article form opens.
- Title: Coffee
- Article Text: Rich, roasted, and endlessly customisable—explore our coffee drinks below.
- Click Save & New.
- Title: Espresso
- Article Text: A concentrated shot of coffee, brewed under pressure for a bold, rich flavour.
- Click Save & New.
- Title: Latte
- Article Text: Espresso combined with steamed milk and a light layer of foam.
- Click Save & New.
- Title: Tea
- Article Text: Light, aromatic, and steeped to order—explore our tea varieties below.
- Click Save & New.
- Title: Green Tea
- Article Text: A lightly oxidised tea with a fresh, grassy flavour.
- Click Save & New.
- Title: Black Tea
- Article Text: A fully oxidised tea with a bold, robust flavour.
- Save & Close.
Steps
Create a Multi-Level Menu
- Navigate to Menus > Main Menu and click New. Result: A new menu item form opens.
- Title: Coffee
- Menu Item Type: Articles > Single Article
- Select Article: Coffee
- Parent Item: - No parent -
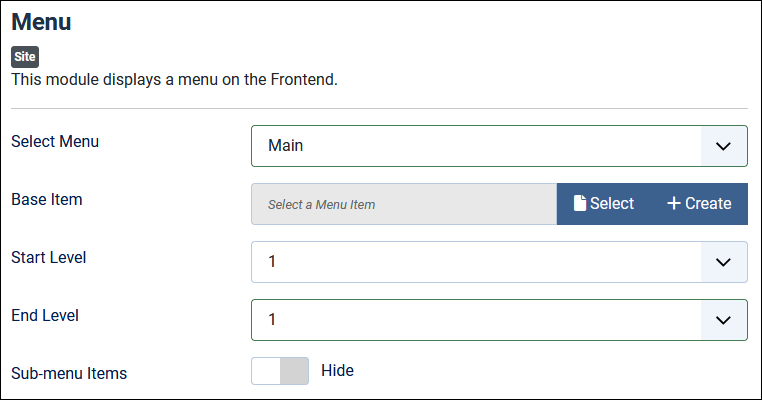
Configuration of the main menu module. - Click Save & New.
- Title: Tea
- Menu Item Type: Articles > Single Article
- Select Article: Tea
- Parent Item: - No parent -
- Click Save & New.
- Title: Espresso
- Menu Item Type: Articles > Single Article
- Select Article: Espresso
- Parent Item: Coffee
- Click Save & New.
- Title: Latte
- Menu Item Type: Articles > Single Article
- Select Article: Latte
- Parent Item: Coffee
- Click Save & New.
- Title: Green Tea
- Menu Item Type: Articles > Single Article
- Select Article: Green Tea
- Parent Item: Tea
- Click Save & New.
- Title: Black Tea
- Menu Item Type: Articles > Single Article
- Select Article: Black Tea
- Parent Item: Tea
- Save & Close.
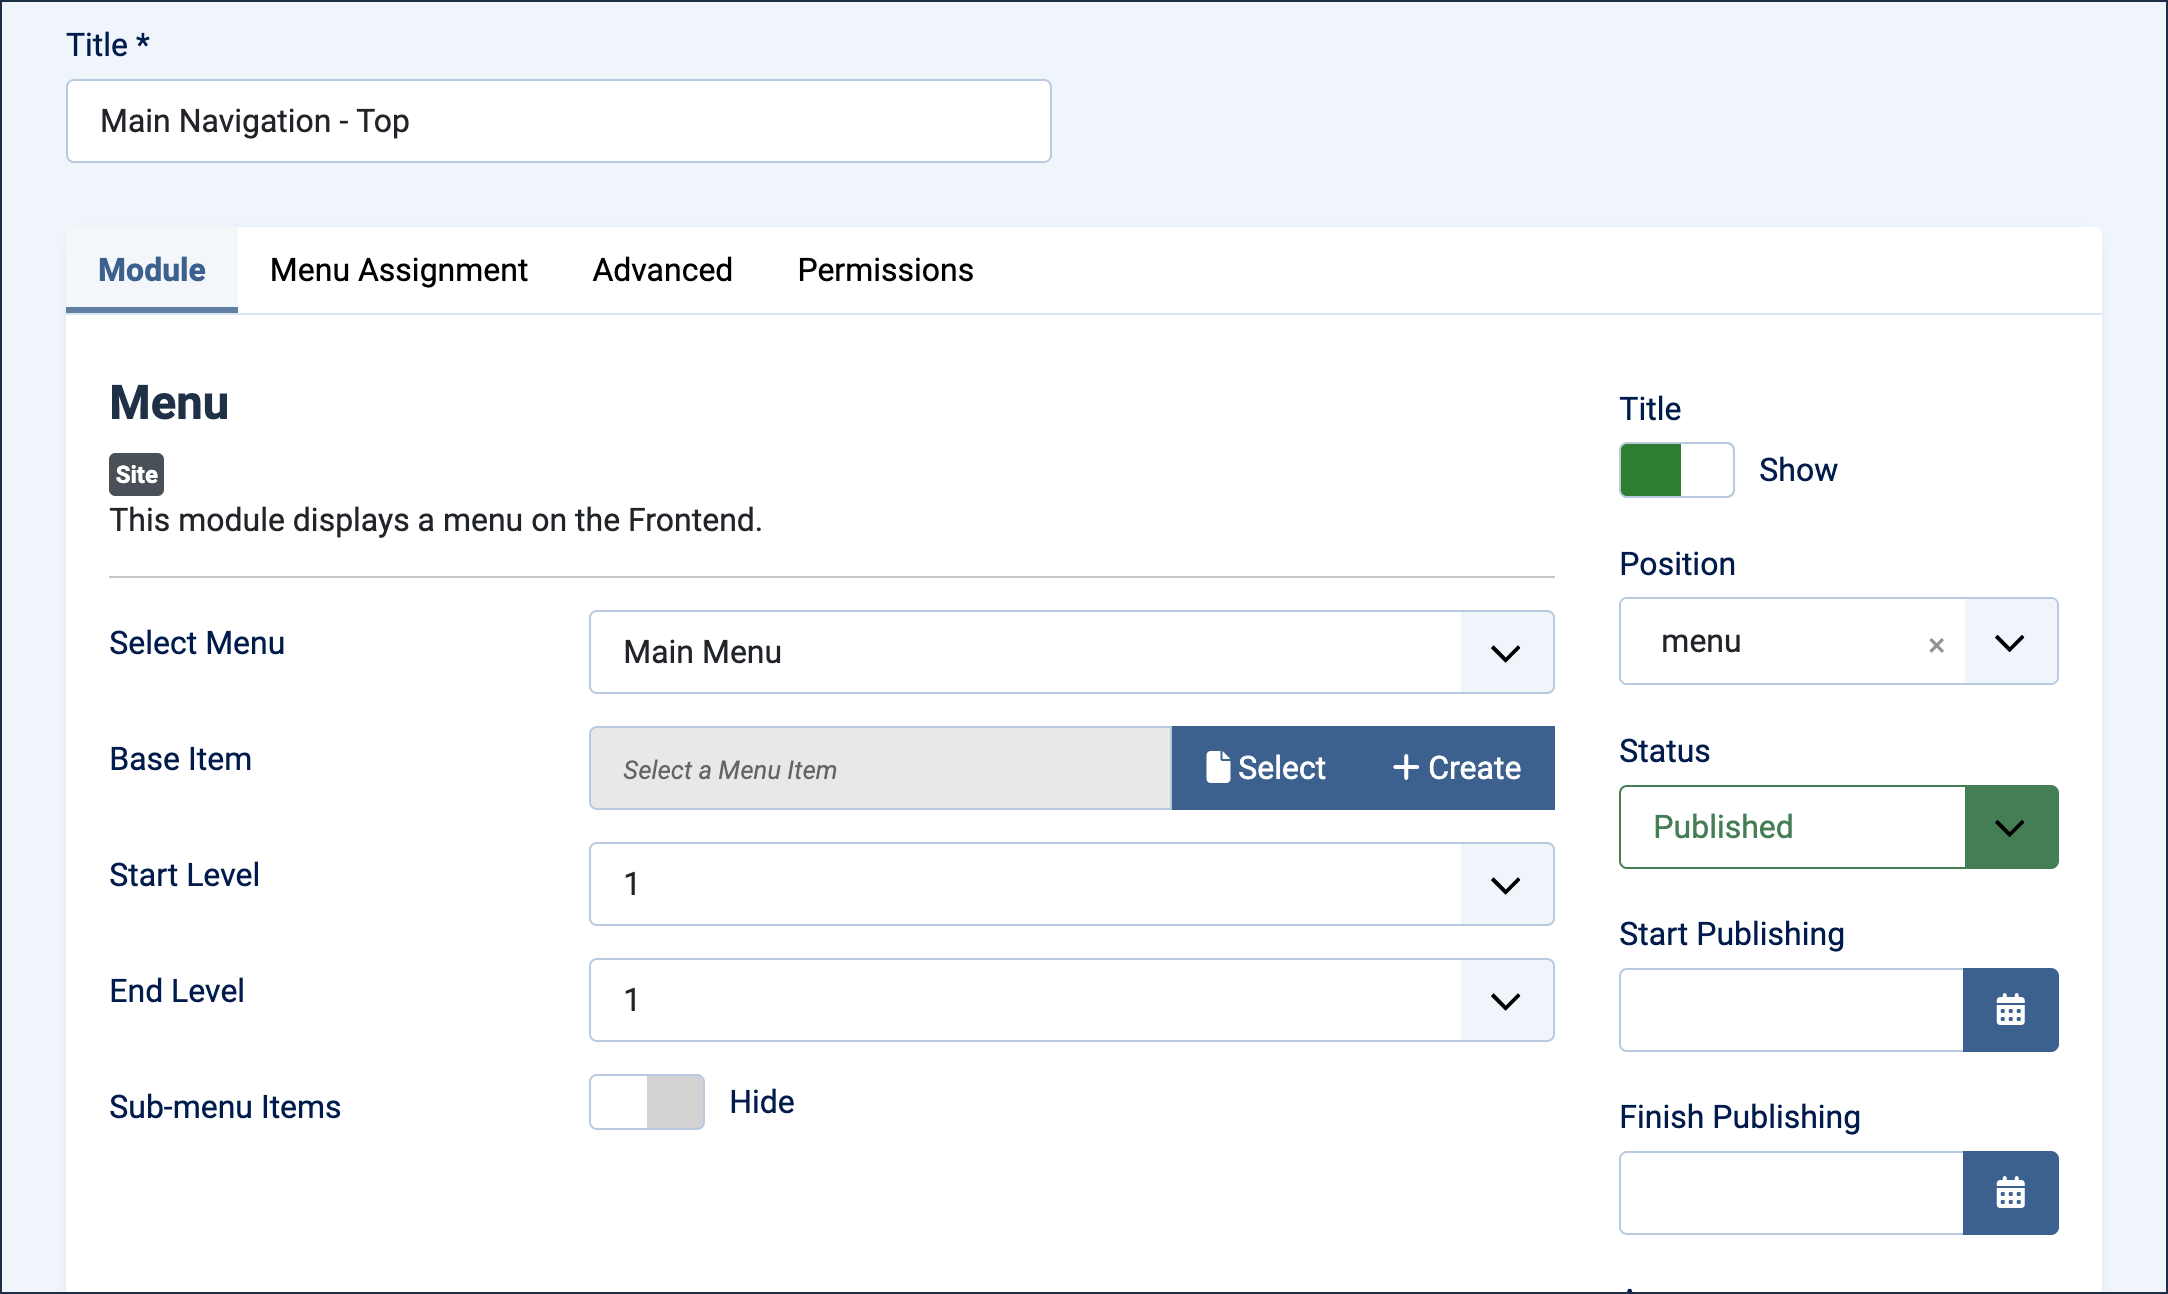
Configure the Top Menu
This module displays only the top-level items (Coffee, Tea) horizontally, ignoring their children.
- Navigate to Content > Site Modules and click New. Result: The Select a Module Type window appears.
- Click Menu.
- Title: Main Navigation - Top
- Select Menu: Main Menu
- Start Level: 1
- End Level: 1
- Sub-menu Items: Hide
- Position: menu
The top-level menu module configuration - Save & Close.
Configure the Sub-menu
This module displays the children of whichever top-level item is currently active, updating dynamically as visitors move between sections.
- Navigate to Content > Site Modules and click New. Result: The Select a Module Type window appears.
- Click Menu.
- Title: Sidebar Sub-menu
- Select Menu: Main Menu
- Base Item: leave blank.
- Start Level: 2
- End Level: All
- Sub-menu Items: Show
- Position: Sidebar left [sidebar-left]
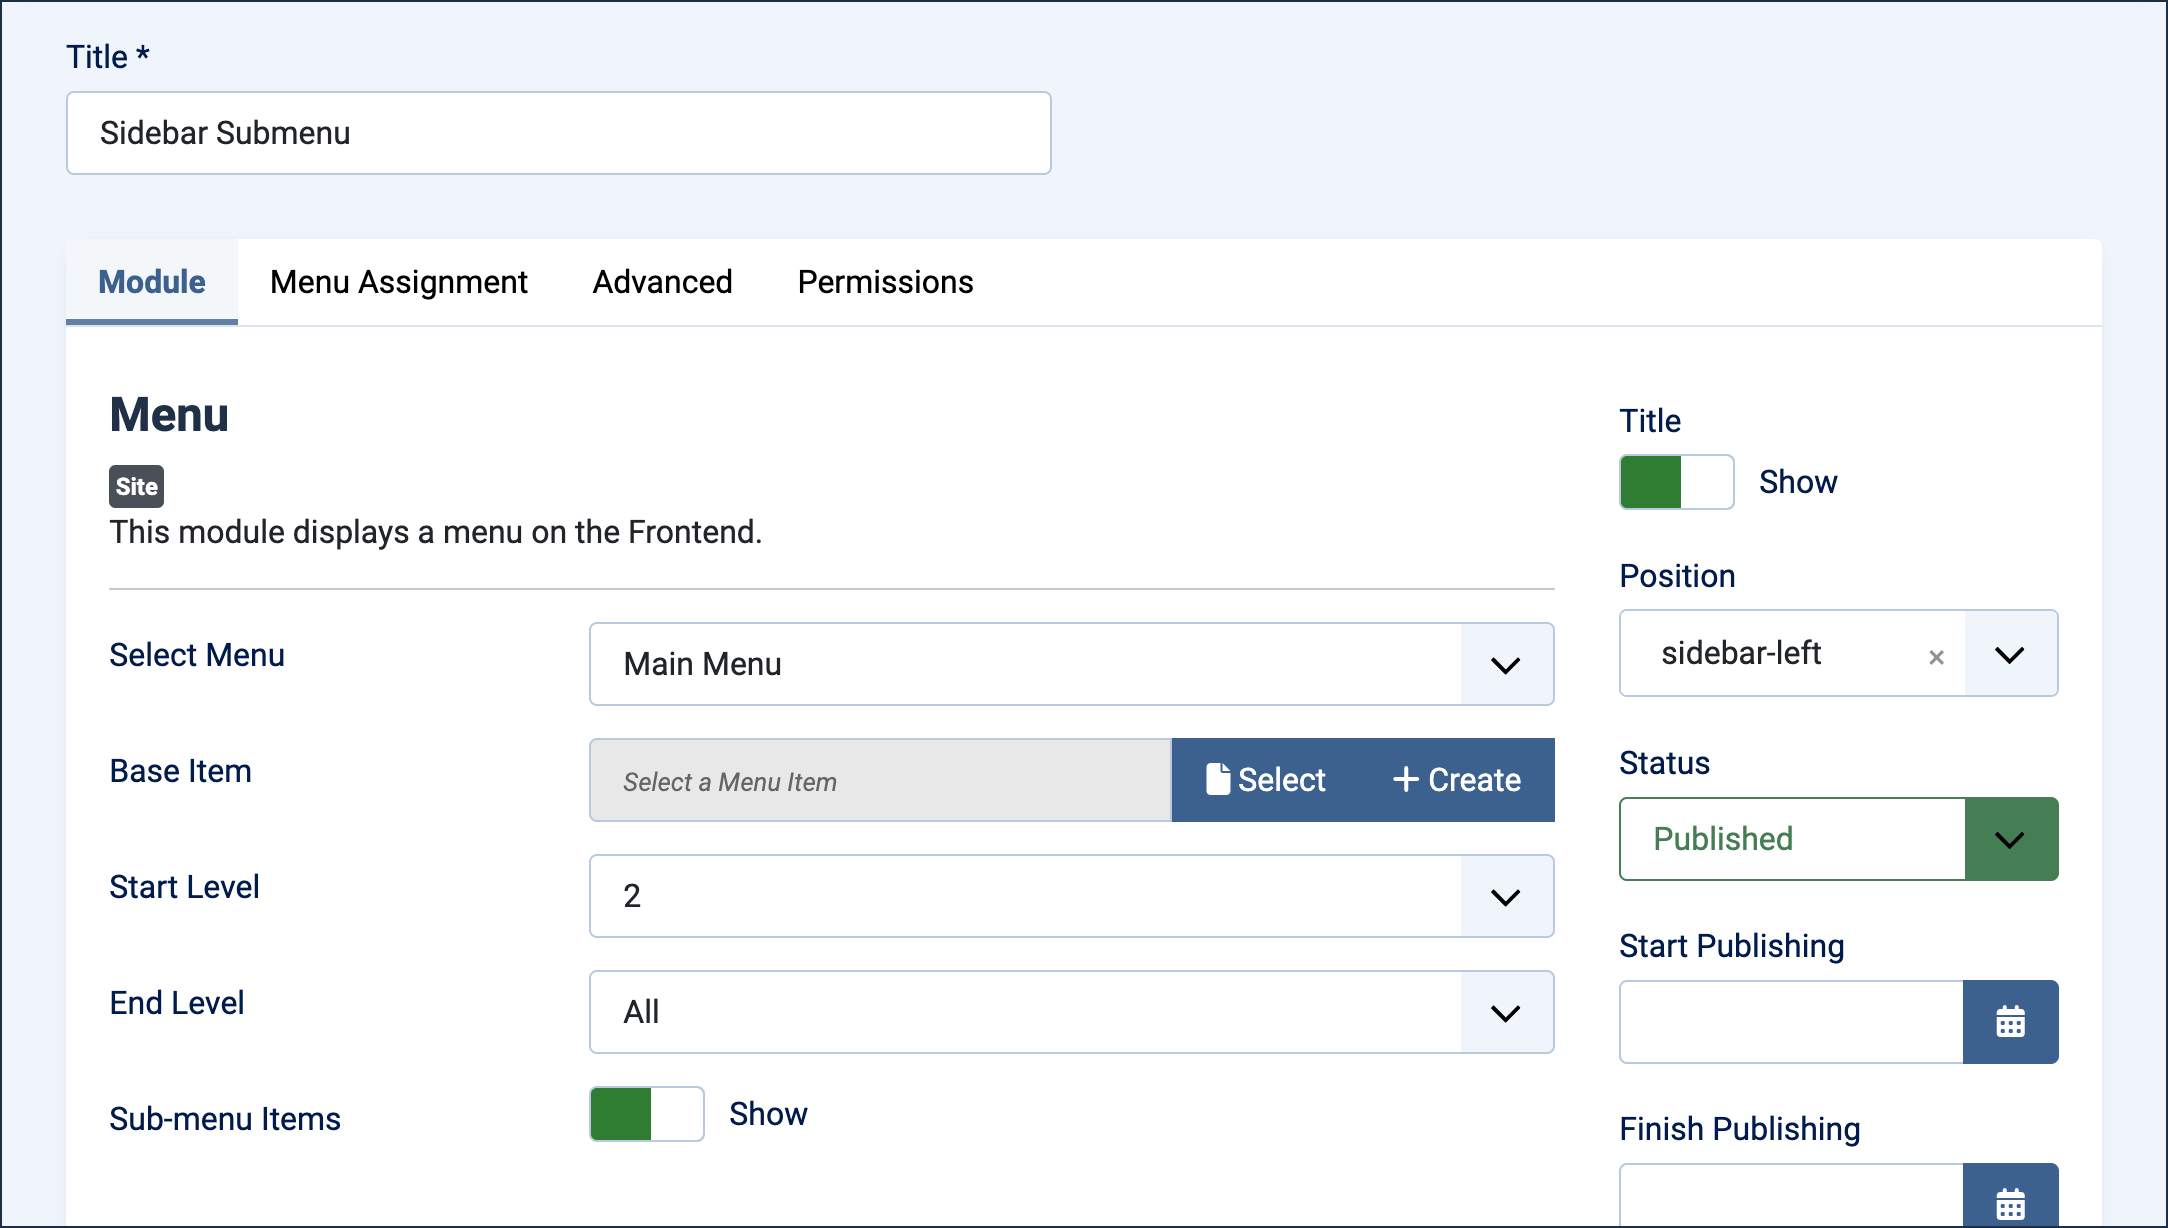
Configuration of the sub-menu - Save & Close.
View the Results
- View the site and click Coffee in the top navigation. Result: The Coffee article appears, and the sidebar sub-menu shows Espresso and Latte.
- Click Tea in the top navigation. Result: The Tea article appears, and the sidebar sub-menu updates to show Green Tea and Black Tea.
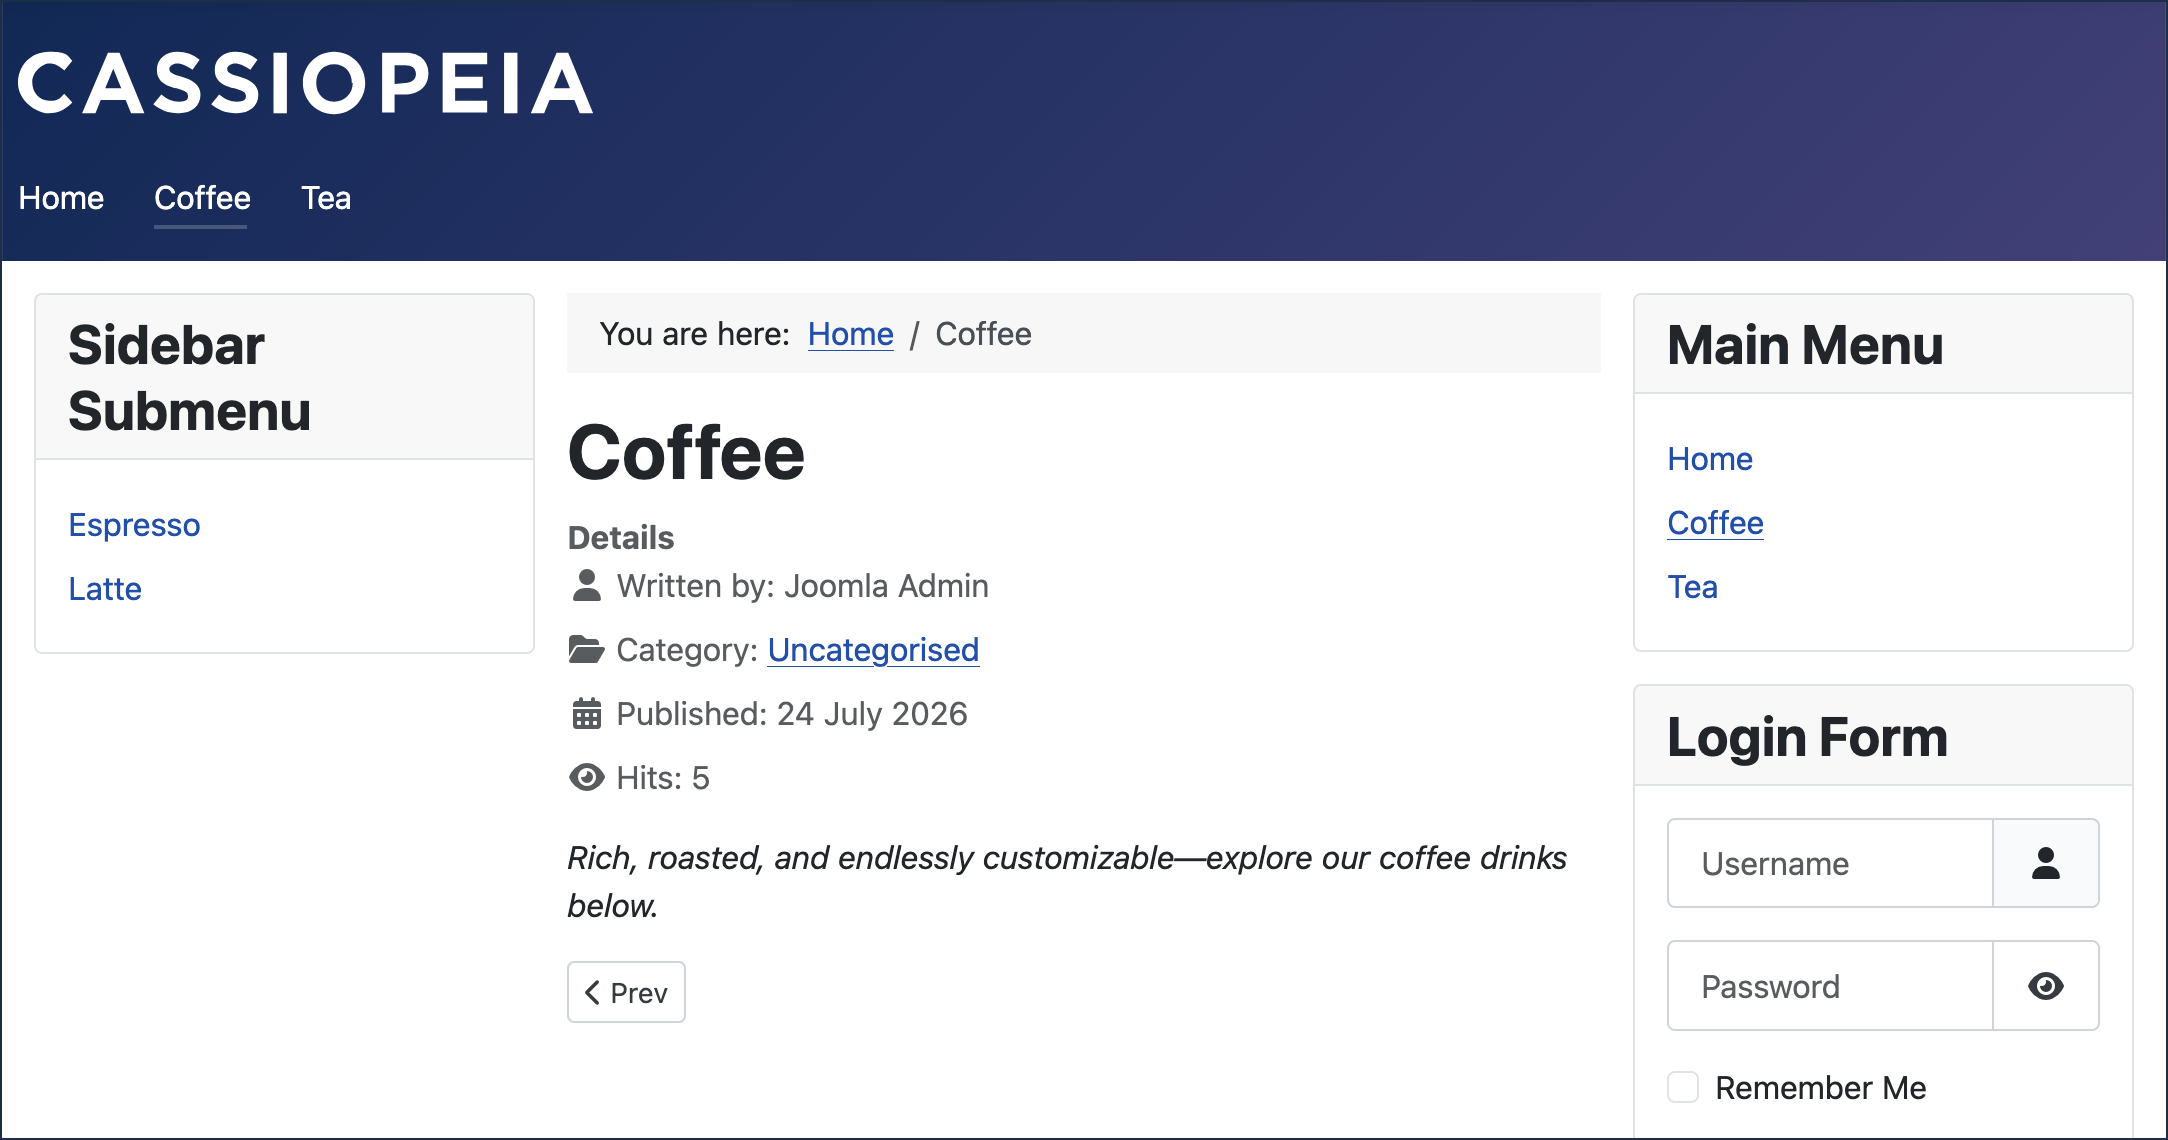
Split menus in the frontend
Concepts
A split menu relies on two separate menu modules pointing at the same underlying menu, each configured to show a different slice of it. The Start Level and End Level settings control which levels of the hierarchy a module displays; setting both to 1 shows only top-level items, while a Start Level of 2 with an End Level of All shows every level below the top.
Leaving Base Item blank makes a module dynamic: instead of always showing the children of one fixed menu item, it shows the children of whichever top-level section the visitor is currently in.
Menu Assignment can be used to hide the secondary module on pages where it wouldn't apply, such as the homepage, by setting it to Only on the Pages Selected and choosing specific pages.